The quilting of a smaller quilt…
(This post includes unpaid advertising)
... can be a lot of fun. Not only, because it can be sewn fast. In a small amount of time “you can equip your Longarm Q24 with a "blank"” and change the effect of a top fundamentally.
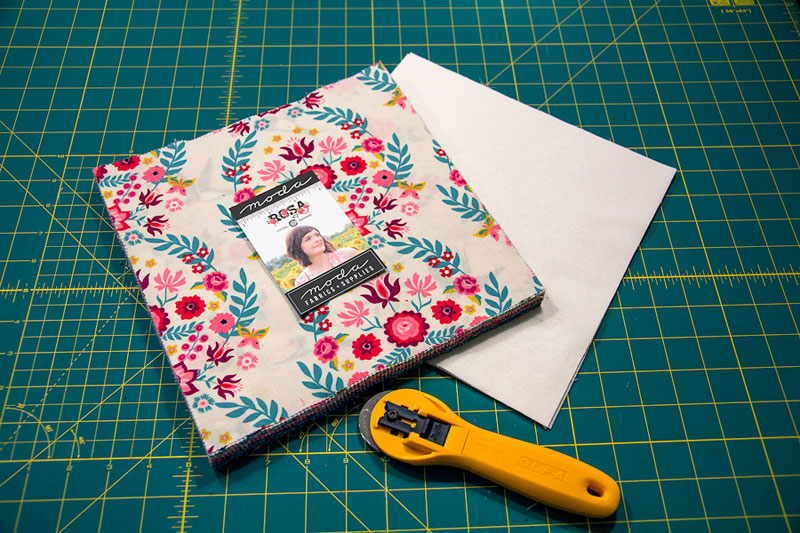
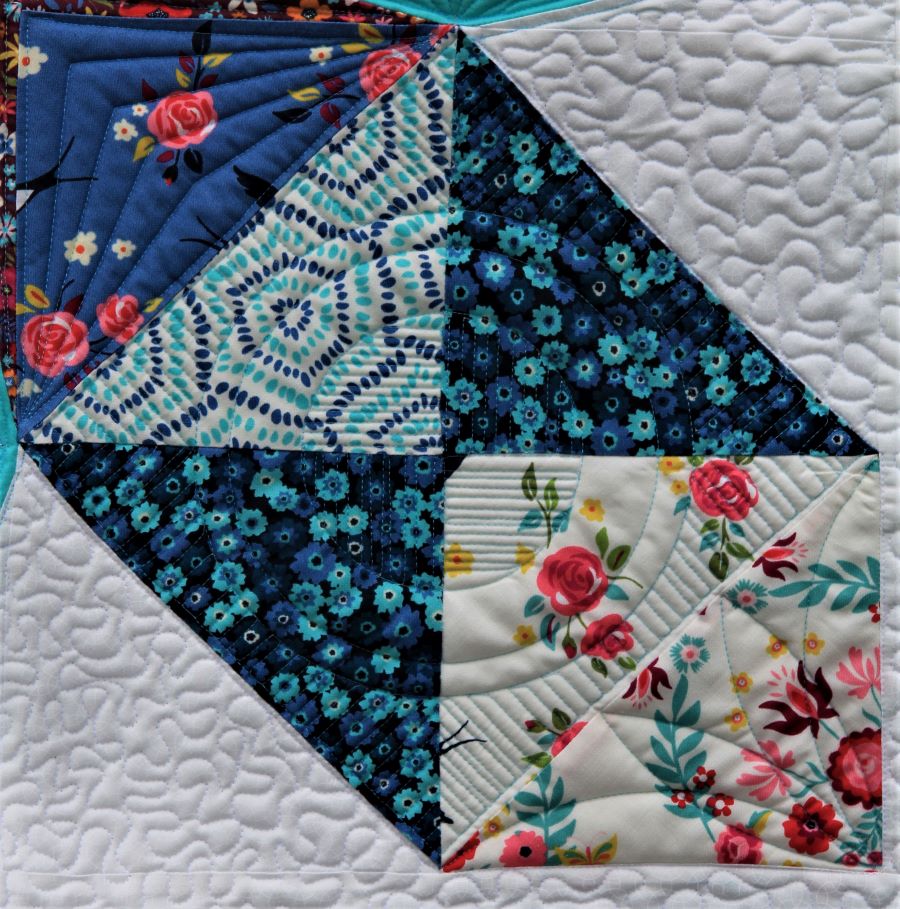
Since Istill had some left-over materials from the Layer Cake “Rosa” (produced by Moda Fabrics), I decided, to sew a second Miniquilt. Equally to my previous quilt, I complement the fabrics of this series with white, discreetly patterned cotton fabric squares (10″x10″) added.
In the center of the quilt, I use a green uni-coloured fabric .
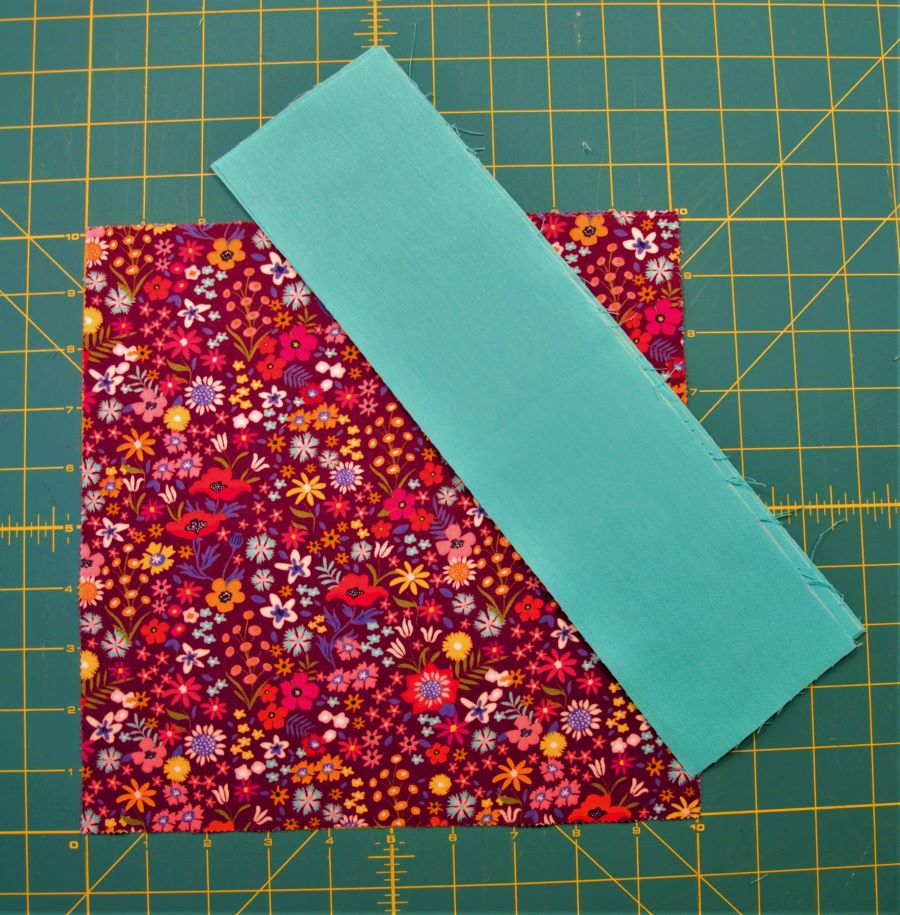
For this quilt, too, one colored and one white fabric square (or. one lighter and one darker square of fabric) placed right sides on top of each other and quilted all around with a seam allowance of ¼ ". Following this step, I cut the resulting squares diagonally using a rotary cutter and iron the produced triangles back to squares. Unfortunately, I missed the opportunity, to make photos of cutting and sewing of the middle part . I'll make up for that in the future. At the end, each block receives two strips of white cotton, performing as the outer edge. For binding, I use a grey coloured fabric.
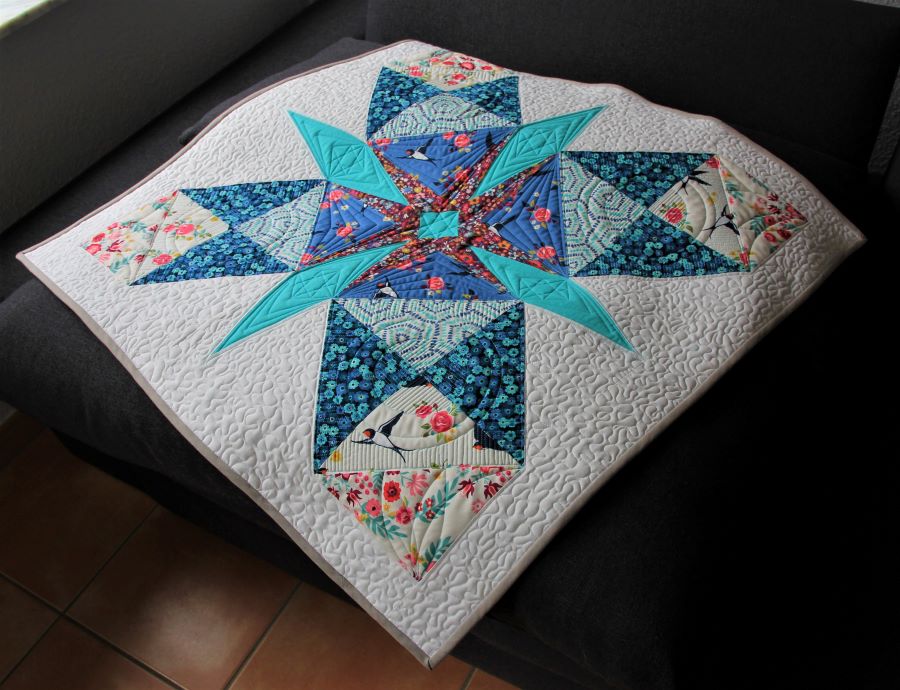
As in the first Miniquilt I mostly use rulers made by Amanda Murphy, for the center of the quilt, I use a straight on. Using additional lines, I underline the five Ricochet Stars.
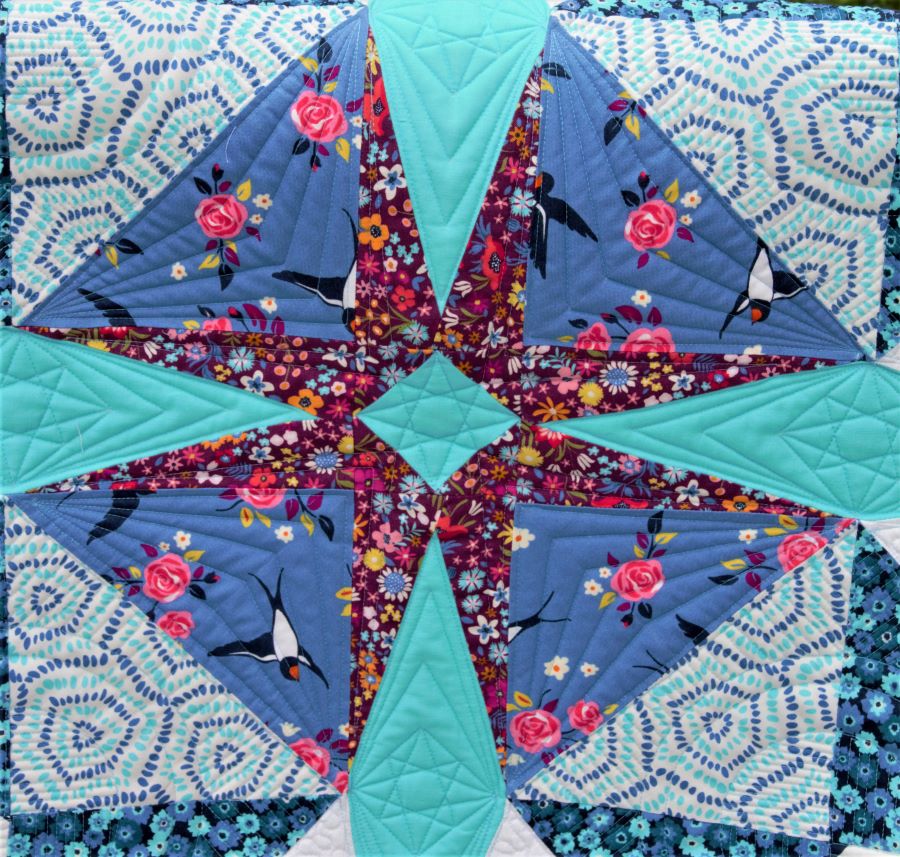
The four outer blocks receive a circular pattern, which is emphasized by densely placed lines.
On the next photos, showing the back of the quilt, you can really get a good impression of the quilted part itself.
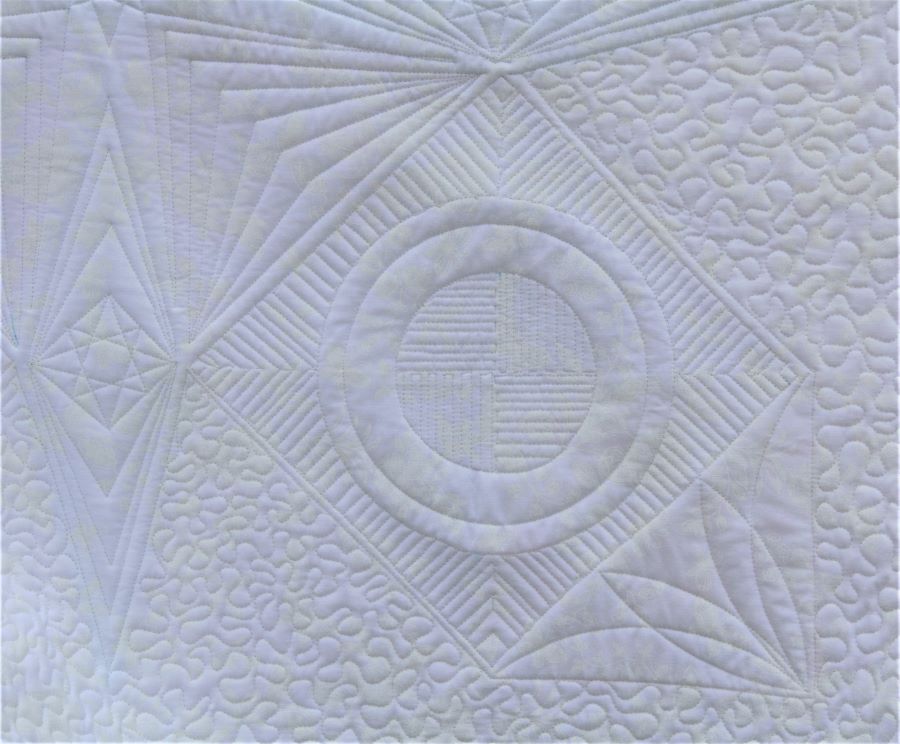
For the remaining surface, I quilt in a meandering style. This highlightsthe ruler-pattern even more. I like the back of the quilt as much as the front!
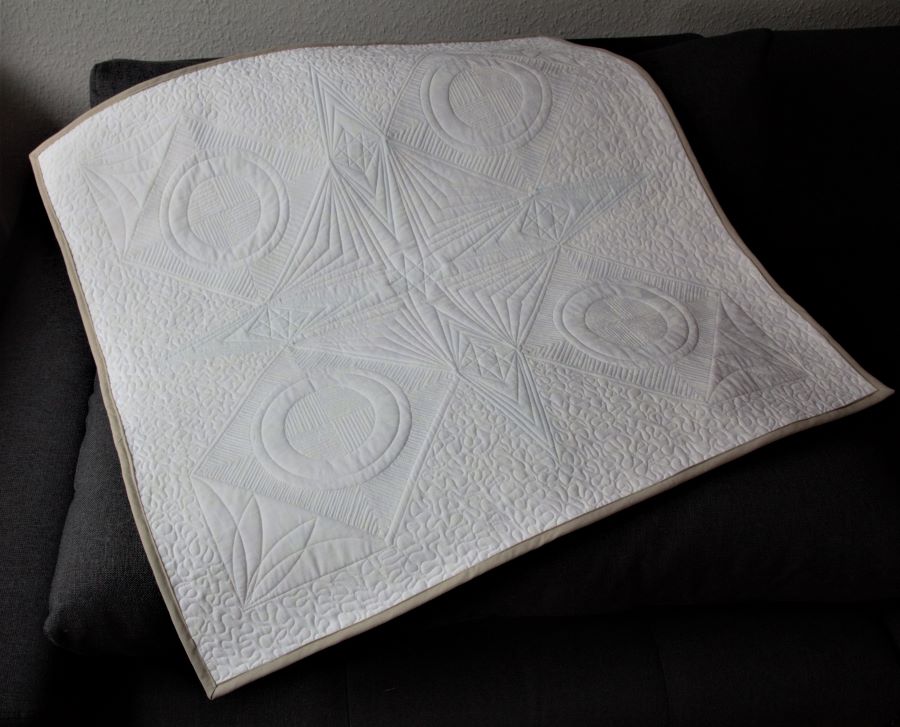
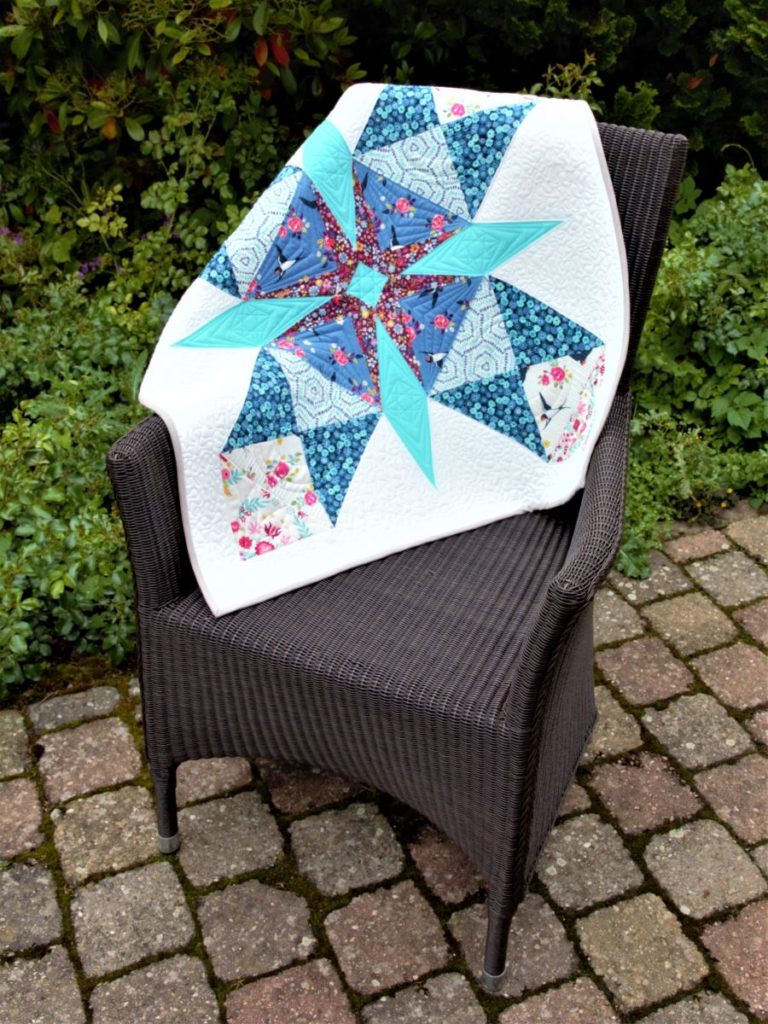
The finished quilt has a size of . 32“x32“ (80cm x 80cm). You can have a closer look to the individual quilt patterns in the quilt pattern gallery.
![]()